Operation instruction
1 Nova Remote Control including:
-
Charging Base
-
Product Guide QR Flyer
-
Adapter
-
Power Line

In this screen you'll see a scrollable overview of apps, sources and quick actions.
In the example screenshot, four quick actions are available: Movies, TV Shows, Music, Crew Call, and Vessel. Selecting Movies, TV Shows, Music, or Vessel will open their respective sections within the LAVIE TV app. The Crew Call action is explained in the following subchapter.
The other icons are sources and/or apps. These are easily configurable via the LAVIE System. When an icon is pressed it will display the sources and/or launch apps.

Top bar, apps & sources

When an option is selected the remote will send the crew call and the window will be closed followed by a notification when the call has been made successfully.
Alternatively the ‘Cancel’ button can be pressed to cancel the action.
Crew call can be called in three ways:
-
Press the crew call button in the left-top corner of the screen.
-
Press the crew call button in the app and sources overview.
-
Press and hold the physical TV button on the remote.
After one of these buttons is pressed the crew call options screen is displayed like below.
In the center of the screen the time will be displayed. The time can be displayed in either 12-hour or 24-hour format. This can be changed in the system setting. To do so, follow these steps:
-
Click on the battery icon. The system settings screen will open.
-
Scroll down to system settings and select.
-
Select Date & time.
-
Set the settings as preferred.
When the time is pressed you'll be redirected to the NOVA settings/ Zone selected

The menu for NOVA settings and zone selection (when available) will be displayed when pressing the clock on the top of the screen.
Once in the screen you'll be able to select the zone you want. Note: When there are more than 5 zones, the view is scrollable. The selected zone is indicated with a check mark.
(Bluetooth) Beaconing: NOVA supports automatic switching between areas. Select ‘Auto switch’ to enable and ‘Manual switch’ to disable. Note: The beaconing system is an optional feature in the system and needs to be set up by the Mr. Smith team. Contact Mr. Smith to check if your system supports this feature.

Press the gear icon to go to NOVA settings. Note: Do not change these settings without consulting Mr. Smith. Current available options:
-
Software version: the current running version of the NOVA software.
-
Device name: here the NOVA remote can have a user specific name.
-
Config data URL: this is the config file which the remote will use, very similar to the LAVIE iPad App.
-
Enable demo mode: Enables the demo mode. This mode will not operate any device. Everything will be simulated.
-
Enable auto mDNS config: this enables the auto configuration meaning it will automatically try to find the server and the corresponding .plist file. Note: this feature needs to be enabled on the server as well to work. Please contact Mr. Smith if this is done so.
-
Key backlight mode: will either turn the backlight of the key permanently on or off. When auto is selected it will do this automatically when for example putting the device in standby.
-
Key backlight timeout (seconds): The amount of time before the backlight will power off after not interacting this the remote.
Wifi settings
When pressing the WiFi icon you are redirected to the WiFi settings. In the WiFi setting you’ll be able to:
-
Turn WiFi On/Off: Toggle WiFi connectivity.
-
Available Networks: View and connect to nearby WiFi networks.
-
Saved Networks: Manage previously connected networks.
-
WiFi Preferences: Enable auto-connect, notifications for open networks, and scanning for better accuracy.
-
Advanced Settings: Access MAC address, IP settings, and configure proxy/DNS settings.
Wifi Indicator
On the top of the screen you'll see an indicator of the WiFi Signal. A WiFi signal indicator shows the strength of a wireless connection using bars. More bars mean a stronger signal, while fewer indicate a weaker or nonexistent connection. Full reception (completely filled) provides the fastest and most stable connection. Great reception (almost full bar) offers reliable speed with minor slowdowns under heavy use. Mediocre reception results in slower speeds. No reception (zero bars) means no connection, requiring users to move closer to the access point or troubleshoot the network.
In the top-right corner, you'll see the battery icon, which displays the current charge level. If the charge drops below 20%, the icon turns orange. When it falls below 10%, it turns red. At this point, ensure you charge your device to continue using it.
When pressing on the battery settings you'll be directed to the system settings. In general use these settings should not be changed. Consult Mr. Smith if you want something changed.The system settings can be accessed through the battery settings. These settings should typically remain unchanged. If you require any alterations, please consult Mr. Smith.
The home screen provides additional information about the current content, along with media controls such as pause, play, and display. Pressing the center icon redirects you to the Apps and Sources overview.

On the remote control page there are more controls available like a numeric keypad and Live TV control buttons. Switching between them can be done via the remote icon in the left bottom corner or the ‘123’ button on the bottom of the screen. The remote control page provides access to additional controls, including a numeric keypad and Live TV buttons. You can switch between the control pages using the remote icon located in the bottom left corner or the '123' button at the bottom of the screen.
Pressing the TV button will display all available Live TV sources. If only one Live TV source is set up, the system will switch to that specific source. If no Live TV sources are set up, this button will do nothing. The same action can be triggered by pressing the physical TV button.


On the domotics page you see an overview of all the rooms in the current zone. When a room is selected by pressing, all available areas (groups) and AC's are shown. After selecting a area the corresponding scenes are displayed. Navigation is done via the back arrow on the bottom of the screen. When you are at the root again, a lightbulb appears. Next to the lightbulb a slider icon is displayed. When pressing this the system will display all available lighting sliders.The domotics page displays an overview of all rooms within the current zone. Selecting a room shows all available areas (groups) and AC's. After an area is selected, the corresponding scenes are displayed. Navigation is via the back arrow at the bottom of the screen. At the root, a lightbulb and slider icon are displayed. Pressing the slider icon shows all available lighting sliders.


AC Control
Other than lighting scenes the AC can be controlled. These are in a separate section in a room indicated with ‘A/C’ and fan icon. Once in there a big slider is presented to set the temperature. Slide up to heat up and down to cool down. On the button of the screen a temperature meter is displayed as well as a fan icon. When pressing the fan icon the screen will more the fan control. The ‘+’ icon will increase the fanspeed and the ‘-’ will decrease the fanspeed. The ‘A’ icon will set the fanspeed automatic mode.The AC controls are located in a separate section of a room, designated by an “A/C” and fan icon. Use the large slider to adjust the temperature; slide up to increase and down to decrease. The on-screen button displays both the temperature and a fan icon. Press the fan icon to access fan controls: '+' increases fan speed, '-' decreases fan speed, and 'A' enables automatic fan speed mode.


In the volume control screen an overview of all available audio zones are displayed. Drag the bars up and down to change the volume.The volume control screen displays all available audio zones. Adjust the volume by dragging the bars up or down.

-
Model
-
EAN Code
-
Size
-
Base size
-
Battery capacity
-
Mains input
-
Screen size
-
Communication protocol
Nova Remote control
6152731558528
227 x 54.8 x 12.2 mm
90 x 22 mm
2000mAh
DC 5V, 1.5A
3.1 inches, 480 x 800
Wifi
As the manufacturer, we guarantee that this remote control is free from defects in materials and workmanship for a period of 12 months from the date of purchase. This guarantee covers normal use and excludes damage caused by misuse, accidents, or unauthorized modifications. If a defect occurs within the warranty period, we will repair or replace the product at our discretion. Proof of purchase is required for any claims. This guarantee does not affect your statutory rights. For further assistance, please contact our customer support.
Add a Title
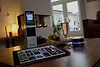
Remote Control charging
Power on the base and place the remote control on the base to charge. The base has a star ring light, which is convenient for you to put the remote control back into the base in the dark. You can also turn on/off the star ring light through the button at the bottom of the remote control.
Remote control startup and setting
Press and hold the button on the side of the remote control for 2 seconds to turn it on. If your remote control has been pre-programmed, WiFi may already be set up. Otherwise, you can configure the WiFi settings now.
Left and right sliding
Slide left and right to switch different device control pages
Slide upward
Enter more device/scene control list
